
Allyson Locke M.S., OTR/L & Sarah Glovasky M.S., OTR/L
Summer is fast approaching but that doesn’t mean kids need to lose the skills they developed over the last academic year! Last year, we posted a blog filled with summer activity ideas geared toward preventing the “summer slide”. As therapists, we know summer activities provide numerous opportunities to develop and build skills that will be needed for the upcoming school year in fun and non threatening ways. So we are bringing back the topic with this new post. New this year are more activity ideas and contributions from Sarah Glovasky M.S., OTR/L! As always appropriate supervision is recommended!
Get Messy!
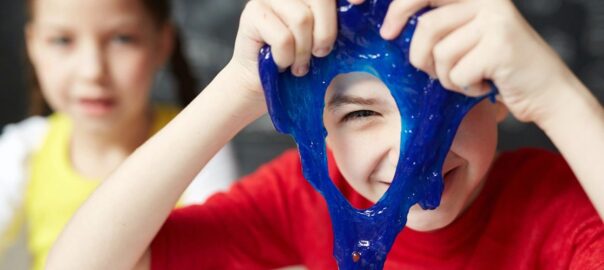
Messy play is a great way to develop the sensory skills needed for important school tasks like handwriting and social interactions. Summer is the best time for these messy activities because they can be done outside leaving the mess outdoors. An added bonus is that it is usually warm enough for a quick wash with the hose before going back inside. A few ideas to try:
- Hide objects (like rocks, sticks, or mini animals) in a pile of mud, shaving cream, or leaves. How fast can you find them? How many can you find in 10 seconds? Not only is this a great sensory activity it helps strengthen the visual perceptual skills needed for academic tasks like reading!
- Stomp in rain puddles, roll down a grassy hill, or skip through a soft patch of dirt. These big body movements help develop the vestibular and proprioceptive systems which are so important for self regulation!
When it is too hot or too rainy to go outside there are still plenty of opportunities for sensory exploration that are a bit less messy!
- Make a sensory collage with items found in the recycling bin or use the Sensory Collage Kit! How many different textures can you incorporate? What textures do you like to feel? As a bonus, ripping, crumpling and rolling paper, tissue, and cardboard are all great ways to strengthen the muscle of the hand. For more ways to use recycled materials check out Second Hand Therapies.
From: Second Hand Therapies: Recyclable Strategies & Useful Tools
Make Art!
Art projects afford great opportunities to develop the small muscles in the hand. This muscle development is critical for academic tasks like writing with a pencil and cutting with scissors. Get creative with your art projects, try:

- 3D Art. Three dimensional art helps kids build form and space concepts. Building a fairy castle outside is a great way to learn about size concepts. Inside, building with blocks, clay or even pillow cushions is a great way to explore how these concepts work. To add a sensory component try using scented dough!
- Tie-Dye Prints: This is a great outdoor activity! First color an old bed sheet or large piece of paper with washable markers. Next use a spray bottle, filled with water, to squirt the drawing. Watch the colors mix and swirl together! Using a spray bottle not only helps build the muscles in the hands it is also great for bilateral coordination! For a smaller scale version, use an eyedropper to wet the paper!
- Draw pictures in the dirt or other mediums like pudding (great for kids who like to explore with their mouth!) Use a stick, rocks, or fingers to draw with! We still love the Ed Emberly drawing books when you need drawing inspiration, stencils are another helpful tool! Drawing is so important for early writers and is great for visual perceptual development!
Play With Bubbles!
Many skills can be targeted with simple bubble activities. Eye hand coordination and oral motor development are just a few! Blowing bubbles is also great for attention and regulation; to learn more about this check out the book M.O.R.E.: Integrating The Mouth With Sensory And Postural Functions. For fun with bubbles, try:
- Making Bubble Art! Make bubble paint by putting a small amount of bubbles and a dab or two of food coloring in a bowl (use different bowls for different colors). Use a bubble wand and dip it into your favorite color. Blow the colored bubbles right at plain paper and watch the designs come alive!
- Play Catch! Chasing after, stomping on, and catching bubbles are great ways to get some extra energy out. It is also a great way to develop eye-hand coordination and the visual skills needed to complete academic tasks like copying from the board. To make bubbles easier to catch try using Touchbubbles!
- Make A Mountain of Bubbles! For a fun indoor activity, fill a small dish bin or other similar size, shallow bucket with lots of dish soap and a few inches of water. Use a straw to slowly blow into the water to make a mountain of bubbles. To really work the muscles in the mouth try a long straw or one with lots of twists like the Krazy Drinking Straws or Connector Straws.
With these fun activity ideas the learning doesn’t have to stop when school is out. Keep skills sharp and be ready for the upcoming school year!
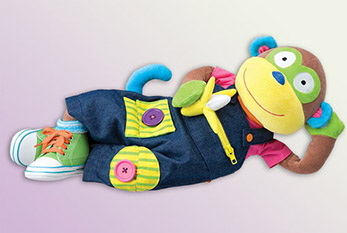
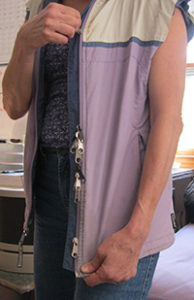 Many children are able to close a zipper once the slider is connected. But connecting the slider onto the zipper is very tricky. In the photograph you see me wearing an old jacket and attaching several zipper sliders. The sliders are sold in zipper repair kits or you can remove nice big ones from broken backpacks and suitcases. I have taught adults with developmental disabilities to zip their own jackets after practicing connecting and pulling up several slider every day.
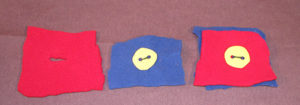
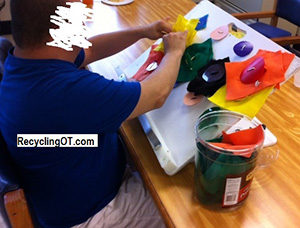 Opening buttons, screw caps, zippers and knots seems to be a lot easier than closing them. One of the strategies I describe in my book From Flapping to Function: A Parent’s Guide to Autism and Hand Skills is to teach children to “ take- apart” before teaching them to “put-together”. In this way they will become familiar and successful with the materials before learning the more challenging motor skills of tying, buttoning, snapping, screwing lids etc. It is much easier to remove the fabric pieces from the “buttoning board” shown below and children will have many opportunities to practice. This board was made by drilling holes into a book stand and tying the “buttons” onto cord that is knotted through the holes.
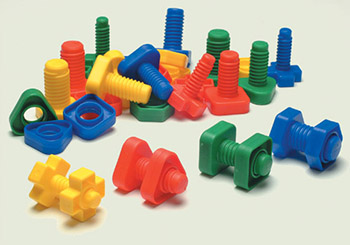
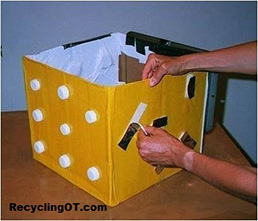 In my book The Recycling Occupational Therapist I describe how to make activities that are perfect for opening and taking apart. The Manipulation Box shown in the photograph has screw covers, Velcro strips, pull lids, and magnets attached to a cookie sheet so that children can remove a variety of objects to drop inside.
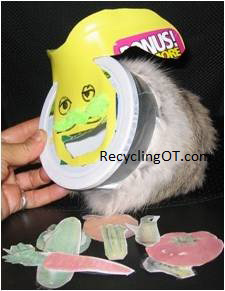 I covered an oatmeal container with fur, attached a face to the lid and photocopied some food items. Now “Feed the Bunny” is more than a plain old shape sorter. This great for working on choice making (i.e. shall we feed bunny a carrot or tomato?), identifying pictures, counting and of course promoting a healthy diet. I hope that you have fun implementing some of these strategies!
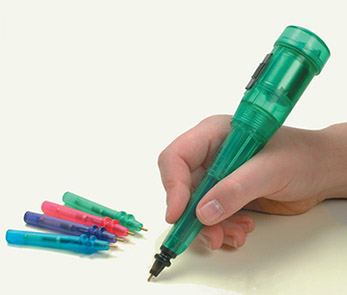
 Barbara A. Smith has worked with children and adults with developmental disabilities for over 40 years! She is the author of the Recycling Occupational Therapist, From Rattles to Writing: A Parent’s Guide to Hand Skills and From Flapping to Function: A Parent’s Guide to Autism and Hand Skills. Learn more about her work at