Monthly Archives: October 2012

The Family of Chewy Tubes

Which Chewy Tube is right for your child? With this guide, you’ll be able to pick the perfect resistance and style.

Yellow (smooth)

The Yellow Chewy Tube is used with a smaller jaw, typically infants and children up to 2 years old and individuals who cannot open the jaw very wide. The Yellow Chewy Tube features a narrow stem of 3/8″ OD.

Red (smooth)

The Red Chewy Tube is typically used with toddlers, older children and adults to provide a smooth surface for practicing biting and chewing skills. The Red Chewy Tube features a stem of ½” OD.

Green (knobby)

The Green Knobby Tube offers increased sensory input from the raised bumps along the bitable stem. It provides a slightly firmer bitable surface. The Green Knobby Tube features a stem of 9/16″ OD.

Blue (smooth)

The Blue Chewy Tube is the largest and firmest of the Chewy Tubes. It is intended for adolescents and adults with developmental disabilities, autism or sensory integration disorders. The Blue Chewy Tube features a stem of 5/8″ OD.

Red Super Chew (knobby)

The Red Super Chew offers a solid yet bumpy surface for practicing biting and chewing skills. The closed loop handle is easily grasped by little fingers. The Red Super Chew features a stem of 9/16″ OD.

Green Super Chew (smooth)

The Green Super Chew offers a solid and smooth surface for practicing biting and chewing skills. The closed loop handle is easily grasped by little fingers. The Green Super Chew features a stem of ½” OD.

Ps and Qs

Ps & Qs provide a smooth and solid surface for practicing biting and chewing skills. The Q is wide enough for bilateral chewing activities and the P is especially easy to grasp by small fingers or those with low muscle tone.

Chewy Tube handles have corrugated ridges to assist the grasp – especially useful for those who are visually impaired.

It’s Everywhere!! The Therapro Guide to Getting Putty Out

Do you LOVE our therapy putty, but HATE when it gets stuck to something it’s not supposed to? We do, too – so we’ve compiled a list of activities for removing putty from clothing and hair. These ideas were submitted from occupational therapists on the Yahoo Groups’ OT-peds listserv and the American Occupational Therapy Association’s school listserv. Thank you for these useful ideas.

Compiled by Deanna Iris Sava, MS, OTR/L of OT Exchange

  1. WD-40 works well to get putty out of cloth fibers. Test a small area of your carpet first.
  2. Believe it or not, I have found the peanut butter has worked to remove putty from some fabrics. (I’ve used it on small spots on my car seats). Just take a small amount and rub it into the putty that is embedded into the fabric and it loosens up. Then wash the bag to remove the peanut butter. Just one word of caution – don’t automatically dry the shirt in the dryer until you’re sure the putty is out. Air-dry it first. Then if you need to, you can repeat the procedure. Using an automatic dryer before the stain is completely out almost always permanently sets the stain.
  3. Using peanut butter works especially well with hair. I discovered it once when a friend of my son’s got a wad of it stuck in the back of her head. A tablespoon of peanut butter massaged into her hair got it out right away.
  4. If the putty stain is small and you catch it right away (before it goes through the wash), use a small scrub brush and dish detergent. Make sure you scrub WITH the grain of the fabric.
  5. Have you tried freezing the shirt to see if the putty becomes brittle and easier to manage? Putty is known for oozing through woven material.
  6. Use ice to harden the putty and scrape it away, and then spray on upholstery cleaner with a brush. Use Woolite for the remaining stain.
  7. This is how I get small spots of therapy putty out of clothing. Take the whole wad of putty and press it hard on the putty on the shirt. Keep doing this over and over and over. The putty should stick to itself and come off a little at a time.
  8. I have used the putty pressed into the spot over and over and then spot cleaned with rubbing alcohol for the last stain.
  9. Use Goo-Gone and elbow grease for cleaning up putty!
  10. Get putty out of hair by using vegetable oil or peanut butter, then a couple of good shampoos.
  11. Try Goof Off (you can find it at Home Depot) – it’s made to get rid of paint spots. Rub it into the putty stain and wash in hot water. The stain should come out.

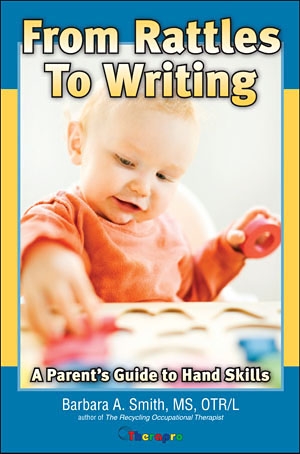
From Rattles to Writing: a guest post by Barbara A. Smith, MS, OTR/L

Barbara Smith, MS, OTR/L, author of From Rattles to Writing: A Parent’s Guide to Hand Skills, recently wrote a post about her book on the blog Two Peds in a Pod.

This groundbreaking guide describes the songs, games, toys, activities, and adaptations that help children develop the visual-perceptual skills needed to read and the eye-hand coordination to write.

Blocks and stacking are especially important in early development – read more on the blog.

from-rattles-to-writing

Find From Rattles to Writing, and other Fine Motor activities, at therapro.com.