Tag Archives: parent resources

Keeping Skills Sharp All Summer Long

Summer activities are filled with opportunities for the continued development of skills learned during the previous academic year. Summer activities also provide numerous opportunities to develop and build skills that will be needed for the upcoming school year. 

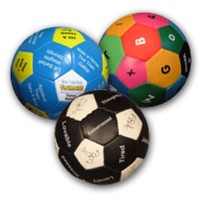
Play Ball! The visual tracking and coordination needed to accurately catch and throw a ball is linked to academic skills like copying from the board and handwriting.  Help develop these vital skill areas with simple ball games.  For beginners try using Magicatch or Gertie Balls; these types of balls are easier to catch and help to build confidence while ball skills are developing. Build strength and increase body awareness using a weighted ball for a backyard bowling game! Add a sensory element with Porcupine Balls, Koosh Balls, or Slush Balls

Draw! Drawing offers many opportunities to develop visual perceptual skills and fine motor control, essential elements needed for handwriting.  Step by step drawing books, like How To Draw or the Ed Emberly drawing books are great ways to work on these skills along with working on direction following. In the summertime you can get extra creative with drawing mediums and canvases. Sidewalk chalk or drawing pictures in the sand are great options for warmer days. On rainy days, there are many options for indoor art projects!  Tape drawing paper to the wall or the under sides of  a table to help develop shoulder strength and stability.   Try drawing pictures in shaving cream or whipped cream for a fun sensory experience.  

Solve a Puzzle! Dot to Dot Books, Hidden Picture Activities, and mazes  are great rainy-day or long car ride boredom busters! They also offer opportunities to build visual perceptual skills and fine motor control that are essential for neat and legible handwriting.  

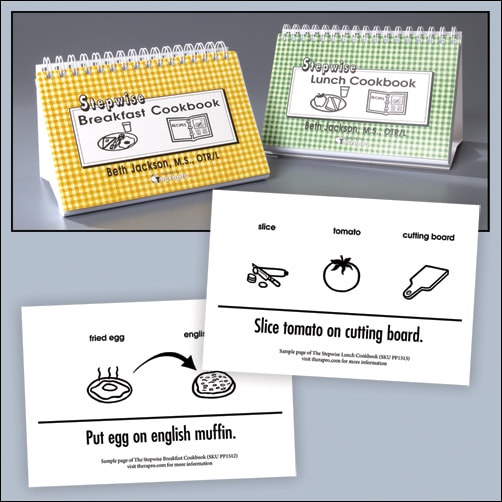
Cooking & Crafts! Students in older grades will be expected to follow schedules and take on large, multi-step projects. Crafts and cooking activities are great ways to prepare for these challenging expectations.  These activities offer opportunities for learning how to  follow sequential steps, manage time,  and problem solve.  Try the free Make & Eat Activities from Sensational Fun

Play a Game!  With so many game options available there is no limit to the skills you can work on! Target executive function skills with the game Rush Hour, work on handwriting skills with Letter Treasure Hunt, develop directionality skills with the game Left Center Right, or work on grammar skills with the game NOVENOPS! For more ideas check out Therapros’s handy guide, Gear Up For Games!

Keep skills sharp and prepare for the upcoming school year with summer fun! 

Using A Battery Interrupter: As Easy As 1, 2, 3!

Incorporating battery interrupter devices into therapeutic and educational settings can significantly enhance accessibility and engagement for individuals with motor challenges. These devices allow standard battery-operated toys and tools to be adapted for use with external switches, promoting independence and participation.

What Is a Battery Interrupter?

Battery interrupters are a useful tool for making battery-operated devices or toys switch-adaptable! Battery interrupters can be used on most devices that are: 

  1. Powered by AA, AAA, C, D, or 9-Volt batteries. 
  2. Turn on or off with a single switch.

Try using a battery interrupter on a commercially available electric bubble toy for some great summer fun or on a simple, battery-operated, musical toy for a cause-and-effect teaching opportunity! 

Benefits of Using Battery Interrupter Devices

  • Enhanced Accessibility: Facilitates interaction with a variety of battery-operated devices.
  • Promotes Independence: Empowers users to control their environment with minimal assistance.
  • Versatility: Can be used across multiple settings, including homes, schools, and therapy centers.
  • Cost-Effective: Adapts existing devices, reducing the need for specialized equipment.

Step-by-Step Guide: Using Battery Interrupter Devices

Setting up a battery interrupter takes just a few simple steps. 

  1. Step 1: Insert the interrupter into the battery compartment between the battery and the compartment wall.  For the 9-volt interrupter, simply clip together the two connection points.   

Pro Tip 1- Only one interrupter is needed per device, regardless of how many batteries are used.

Pro Tip 2- The battery interrupter can be inserted on either the positive or negative end of the battery (n/a for the 9V size)!

  1. Close the battery compartment.

Pro Tip: You may need to cut a small notch out of the battery cover to allow the wires to fit!

  1. Connect your device.

Pro Tip: Battery interrupters work with any standard switch that has a 1/8inch jack

Helpful Hints

  1. Make sure the size of the interrupter matches the size of the battery.  
  2. Turn your device to the “on” position before using it with a switch.  
Diagram showing how to use a Battery Interrupter Device

Tips for Effective Use

  • Safety First: Always supervise the use of adapted devices to prevent accidents.
  • Regular Maintenance: Check connections and battery levels to ensure consistent performance.
  • Customization: Tailor the setup to the individual’s specific needs and preferences.

Using battery interrupter devices is a straightforward and impactful method to enhance accessibility for individuals with motor challenges. By adapting existing battery-operated items, these devices open up new avenues for interaction, learning, and independence.

Tips for Choosing Your Pencil Grip from Gail Kushnir, MA OT, B.Ed

On February 2, 2020 Therapro was happy to host another successful webinar, Let’s Do It Write! Writing Readiness presented by Gail Kushnir, MA OT, B.Ed. During this webinar many writing readiness topics were discussed including the use of pencil grips. Gail noted the purpose of a pencil grip is to provide maximum support to the child in order to allow skill, stamina, and speed while handwriting. With a vast array of grips available, choosing the right one can be a daunting task. Gail simplified the process with these basic rules:

Too much pressure… use a soft grip like The Pencil Grip. This soft, molded grip encourages a natural writing position while minimizing finger strain.

Best For: Children and adults needing general support for a dynamic tripod grasp

Pros:

  • Versatile; works for left and right-handers
  • Comfortable for extended writing

Cons:

  • Less structured than other training grips
  • May not correct more severe grip issues
Ergonomic pencil grip tool for improving handwriting comfort and control

Too much flexibility and instability….use a grip with firm support like the Bulb Grip. The Bulb-Shaped Grip features a round, bulbous design that encourages a natural grasp by positioning the fingers comfortably around the soft contour. It’s especially helpful for young children or those struggling with developing hand strength and control.

Best For: Emerging writers who need substantial support to develop fine motor coordination

The Bulb Pencil Grip

Pros:

  • Promotes a relaxed grip
  • Offers excellent tactile feedback
  • Great for children with low tone or motor planning challenges

Cons:

  • Bulky; may not fit all pencil sizes
  • May not support finger isolation as precisely as more structured grips

Tremors….use a weighted grip at the top of the pencil and The Pencil Grip near the point. Weights add subtle weight to the pencil, improving feedback and hand control.

Best For: Students with tremors, poor proprioception, or sensory processing challenges.

Pros:

  • Enhances body awareness
  • Can reduce tremors or shaky writing

Cons:

  • Heavier than standard grips
  • May cause fatigue if overused
Weight for pencils

Ectopic Dermatitis or physical anomalies….use a tube that increases the circumference of the pencil. This foam tubing can be cut to size and slipped over a pencil to create a larger, cushioned grip. It’s especially useful for clients with arthritis, decreased grip strength, or tactile sensitivity. Unlike traditional pre-formed grips, this option offers full-barrel coverage, enhancing stability and comfort.

Best For: Individuals needing a custom or wider grip diameter for improved comfort and control.

Closed Cell Cylindrical Foam Tubing

Pros:

  • Customizable fit and length
  • Lightweight and soft
  • Ideal for users with joint pain or limited fine motor coordination

Cons:

  • Less structured; doesn’t guide finger placement
  • May not appeal to users needing visual or tactile prompts for finger positioning

In most situations, a slanted surface is crucial! Slant boards promote an optimal writing angle, encouraging better wrist extension, upright posture, and proper eye-hand alignment. When used in combination with the right pencil grip, slant boards reduce fatigue and support more controlled, legible handwriting. Therapro offers a range of options—collapsible, adjustable, rigid, and lightweight—to meet the diverse needs of students and clients.

Best For: Enhancing posture, visual tracking, and hand positioning during writing tasks

Pros:

  • Promotes ergonomic writing posture
  • Improves line of sight and reduces neck strain
  • Supports hand and wrist positioning for improved fine motor control

Cons:

  • Bulky to transport (depending on the model)
  • May require space considerations in smaller classrooms
slant board, black

Still not sure, check out Therapro’s Get a Grip on Grips Handy Guide!